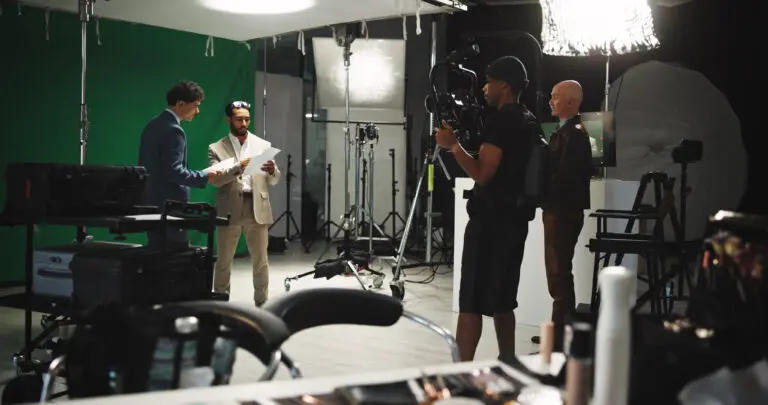

For most actors, working on camera means adapting their technique.
Learning to hit your marks, maintain consistent eyelines and understand frame sizes, all while staying true to your character, is essential to delivering a believable performance on screen.
At first glance, it might seem as though you need to make your performance “smaller,” but there’s more to it than that. Screen acting doesn’t necessarily mean giving less. It means developing the technical skills needed to work on a film or television set without losing the spontaneity and emotional truth of your performance.
Here’s what you need to know about on-camera acting techniques and how to put them into practice.
Key Insights
- On-camera acting requires a balance of technical precision and authentic performance, allowing actors to work naturally within the camera’s frame.
- Hitting your marks and maintaining consistent eyelines help ensure continuity across multiple takes and camera setups.
- Understanding camera shot sizes helps actors adjust their physical choices while keeping their performances grounded and believable.
What Is On-Camera Acting Technique?
On-camera acting technique combines performance skills with the technical awareness needed to work effectively in front of a camera.
Unlike theater, where an audience watches a performance unfold across an entire stage, screen acting is shaped by the camera’s position, lens, framing and distance from the actor. These elements influence how the audience experiences your performance.
On-camera acting also requires consistency across multiple takes and camera setups. A scene may be filmed several times from different angles, moving between close-ups, medium shots and wide shots. Actors need to maintain continuity in their movements, eyelines and interactions with props while keeping each take emotionally connected.
The goal isn’t to make your performance mechanical. It’s to become comfortable enough with the technical requirements that you can focus on playing your character.
For actors transitioning from theater, understanding the differences between stage and screen acting can help make that adjustment easier.
What Does It Mean to Hit Your Mark?
A mark is a designated position on set where an actor needs to stand or stop during a scene. Marks help the camera, focus puller, lighting department and other crew members coordinate their work.
Hitting your mark means arriving at the correct position as part of your blocking, which refers to the planned movements and positions of actors within a scene.
You might have one mark or several, depending on how much your character moves. These positions are often indicated by small pieces of tape on the floor, allowing you to find your place without interrupting the action.
The challenge is hitting those marks without looking down or making your movements feel unnatural.
Pay attention to where you enter, where you stop and why your character might move to that particular position. Create a thought anchor for each movement so that it feels motivated by the scene rather than the technical demands of filming.
For example, your character might cross the room to confront someone, retrieve an object or create distance during an argument. Connecting the movement to a specific intention makes it easier to hit your mark without consciously thinking about the tape on the floor.
Rehearse your blocking with the director and familiarize yourself with the space before filming. The more comfortable you become with your movements, the more freedom you’ll have to focus on your performance.
How Important Are Eyelines in On-Camera Acting?
Eyelines are an essential part of on-camera acting. Your eyeline refers to the direction you’re looking during a scene, whether that’s toward another character, an object or something happening outside the frame.
Maintaining consistent eyelines helps establish where characters are positioned in relation to one another and makes interactions feel believable.
This becomes particularly important when a scene is filmed from multiple angles.
For example, during a conversation between two characters, the camera may capture each actor separately. Their eyelines need to match the established positions of the characters so the finished scene feels like a continuous interaction.
The height and proximity of your scene partner can also affect where you need to look. Sometimes, you may be asked to focus on a specific point just off camera rather than directly at another actor.
Hitting your mark helps establish the correct position for your eyeline, making it easier to maintain consistency throughout filming.
Eyelines are checked and adjusted on set, so pay attention to the director’s instructions and any guidance from the camera department.
Most importantly, don’t become so focused on maintaining the correct eyeline that you stop listening and responding naturally to your scene partner.
Understanding Camera Shot Sizes and Framing
Framing refers to what appears within the camera’s image, including how much of an actor and their surroundings the audience can see.
A close-up might focus primarily on your face, while a wide shot captures your full body and more of the environment around you.
Understanding different camera shot sizes helps actors recognize which movements and expressions will be visible on screen.
Here are some common shot sizes and camera angles to know:
- Extreme Close-Up (ECU): The camera focuses on a very small detail, such as your eyes or mouth. This is often used to emphasize subtle expressions or important visual details.
- Close-Up (CU): Your face fills most of the frame, usually from the shoulders or neck upward. This allows the audience to see facial expressions and subtle reactions.
- Medium Close-Up (MCU): You’re framed from approximately the chest upward, allowing the audience to see your facial expressions and some upper-body movement.
- Medium Shot (MS): You’re typically framed from the waist upward. This provides room for gestures and body language while keeping your face clearly visible.
- Medium Long Shot (MLS): The camera captures you from approximately the knees upward, allowing more of your physical movement to be seen.
- Long Shot (LS): Your full body is visible within the surrounding environment. This allows the audience to see how you move and interact with the space.
- Extreme Long Shot (ELS): You appear much smaller within the frame, with the surrounding location taking center stage. This is often used to establish a setting or communicate scale.
- Two-Shot: Two actors appear together in the same frame, allowing the audience to observe their interaction and relationship.
- Over-the-Shoulder (OTS): The camera frames one character from behind another character’s shoulder. This is commonly used during conversations to establish the spatial relationship between characters.
- Point-of-View (POV): The camera shows what a character is seeing, allowing the audience to experience the scene from that character’s perspective.
- Profile Shot: An actor is filmed from the side, showing their face in profile rather than directly from the front.
- Wide Shot (WS): The camera captures a broad view of the subject and their surroundings, showing how the actor relates to the location and other characters.
Some of these terms describe shot sizes, while others refer to camera angles or compositions. Familiarity with both can help you understand what’s being captured during a scene.
How Does Frame Size Change Your Performance?
The fundamentals of acting remain the same regardless of frame size. What changes is how much of your performance the camera captures.
In a close-up, the audience can see subtle shifts in your expression, including small movements around your eyes or mouth. In a wide shot, your posture, gestures and movement through the space become more prominent.
This doesn’t mean you should automatically make your performance smaller in a close-up or bigger in a wide shot. Your choices should still come from your character’s circumstances and intentions.
Frame size simply gives you information about what the audience will be able to see.
This is especially useful when preparing a self-tape audition. Casting directors often provide specific framing instructions, and following them ensures that your performance is presented as intended.
When auditioning or filming, make sure you understand how you’re framed so you know which movements will remain visible.
During a conversation with director Antoine Fuqua at the Toronto International Film Festival, actor Denzel Washington offered an observation about the relationship between acting and filmmaking:
“Film is a director’s medium. It’s not an actor’s medium. You could be doing the best speech of your life, and the director could be pushing into a bottle.”
The point isn’t that your performance doesn’t matter. It’s that the camera and the director’s choices shape how that performance reaches the audience.
Understanding the frame allows you to work with those choices rather than against them.
How to Work Naturally Within the Frame
One of the biggest challenges of on-camera acting is balancing technical precision with spontaneous performance.
You need to know where to stand, where to look and how to move, but you also need to remain present with your scene partner. Start by learning your blocking, identifying your marks and establishing your eyelines before filming begins.
If the scene involves props or repeated physical actions, rehearse those details until the sequence feels comfortable. For continuity, you may need to pick up an object, turn your head or perform another action at approximately the same moment in each take.
These details matter because scenes are often assembled from footage captured across several setups. Consistent physical actions help the editor create a seamless sequence.
Once you’ve established the technical requirements, shift your attention back to the character. Rather than thinking about where your feet need to land, focus on why your character is moving. Instead of concentrating solely on your eyeline, listen to what your scene partner is saying and allow yourself to respond.
The more you connect the technical details to your character’s intentions, the more naturally they’ll become part of your performance.
Let the Technique Support the Performance
One of the biggest adjustments when moving from stage to screen is learning to trust the camera.
You don’t always need to make your emotions bigger or demonstrate every thought. Some of the most powerful on-camera moments happen when an actor is simply listening and reacting.
Denzel Washington explains this particularly well:
“People don’t understand the hardest thing to do as an actor is to listen. Hardest thing to do as a human being. To listen. And to be quiet and actually not do a whole lot. You know, we think, ‘Oh, the camera’s on. I got to…’ Less is actually more. Less is more.”
As you gain experience, hitting your marks, maintaining consistent eyelines and working within different frame sizes will become more instinctive.
The goal is to develop these skills until they no longer compete for your attention. When you’re comfortable with the technical side of filming, you can devote more energy to listening, reacting and making truthful choices.
Strong on-camera acting isn’t about choosing between technique and emotion. It’s about using both to create a performance that feels natural, consistent and believable on screen.
Final Thoughts on On-Camera Acting Technique
Learning to hit your marks, maintain consistent eyelines and understand camera framing takes practice, but these skills become easier with experience. The more comfortable you are with the technical side of filming, the less you’ll have to think about it when the camera starts rolling.
Strong on-camera acting comes from knowing your blocking, understanding what the camera captures and staying connected to your scene partner. When those elements come together, you can focus on what matters most: delivering an honest, believable performance.